If you are into serious Blogging, setting up a Newsletter is definitely somewhere on your agenda. In this post I will show you how to setup a simple and effective Newsletter using the RSS Feed of your Blog in minutes. We will use MailChimp as our service provider.
1. Create an Account with MailChimp
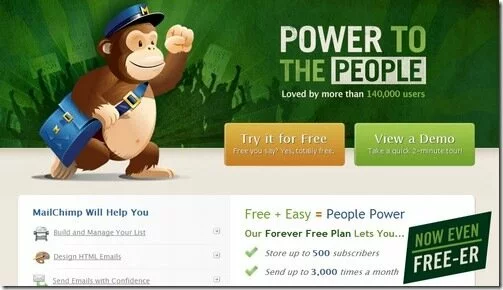
Creating an account with MailChimp is FREE. Just get on to their site and sign up using the “good old sign up form”. They also have an awesome demo video on the home page, which can help you to get started.
2. Setup your Mailing List
The first thing to do after a successful signup, verification and login, is to create a Mailing List. You can find the link to create a List, right after the login.
Mailing Lists are a group of Email recipients, who would be interested in receiving regular updates from your Web Sites or Blogs.
If you have multiple Web Sites or Blogs, then consider creating separate mailing lists for each of them.
Wonderful thing about MailChimp, is the availability of excellent quality videos for any help you may need. Be sure to use them, whenever you are lost!
- Associate your Mailing List with a suitable name, to easily identify when multiple Lists are created in the future
- Add only Email Addresses of those, who are really interested in receiving updates and expressed consent for the subscription
- Associate additional details like First Name, Last Name etc. to easily identify your subscribers
- Any further voluntary subscribers through your Web Site or Blog, will be automatically added to the list
3. Customize and Style your List Forms
A List uses many forms like – Signup Forms, Confirmation Forms, Unsubscribe Form, Welcome Email, Forward to a Friend Form etc.
MailChimp lets you customize each of the forms:
- Decide the style of each of them
- Decide what fields will go with the Forms and what are mandatory
- Decide the error and confirmation messages, etc.
Make sure to review each of your Form and their format.
4. Create your RSS Newsletter Campaign
Once a Mailing List is created, the next step is to create a Campaign for the List.
A Campaign can be thought of as a specific category or type of information, that would be distributed to the members of a List.
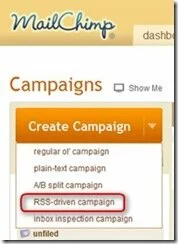
For our tutorial, we will be using the RSS Feed of your Blog, as a source for the Newsletter. In the Create Campaign Page, make sure to choose the option as – RSS Driven Campaign. This will take you through a wizard, before successful creation of the campaign.
Be sure to keep your Blog’s Feed URL handy (for e.g., Feedburner powered feeds are usually like http://feeds.feedburner.com/feedname)
Here are a few tips while creating a Campaign for your RSS Feed.
- Choose Mail Message Subject and From Name to suitably distinguish your Blog or Website (otherwise they may be mistaken for Spam)
- Use Merge Tags to customize the To Name in the Email that will be sent
- Associate your Twitter Account to tweet the newsletter details, after each send
- Choose a HTML Template for your Email, that closely resembles your Blog’s Color Scheme. If in doubt, go for the Plain Template without too many colors
- If HTML Mails cannot be displayed for some reason, the wizard gives you a Plain Text Format that will be shown instead. Make sure you check the details that will be part of this format
- Send Test Mails to make sure that the Format and the Content come up as expected
5. Embed Subscription Form into your Website
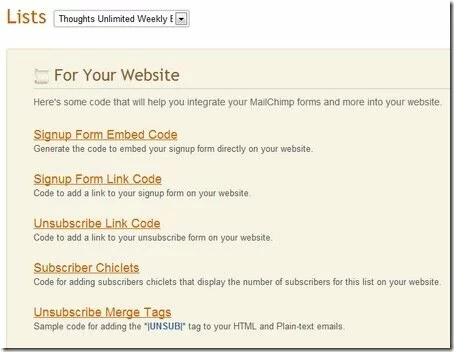
Now is the important step – of integrating your Newsletter subscription Form with your Website. You can go to the Lists section from the Home Page and MailChimp provides you built-in HTML/CSS/Javascript code that can be embedded in to your Blog or Website.
Grab the appropriate Embed Code Snippet for your Blog and use it in a suitable location. To a certain degree, the CSS can be customized to meet your Blog Design.
Voila! Done. Now based on your Campaign schedule, the RSS Feed from your Blog will be converted into a Newsletter by MailChimp and sent to everyone in your Mailing List.
MailChimp allows up to 3000 sends/month and 500 subscribers for the FREE Account. Also, the Forms and Emails would have affiliate links/banners embedded in them. They have flexible Pricing Options – both for Fixed Price and Pay-as-you-go Customers.
Having created a wonderful Newsletter, the onus is on you to create Quality Content that the readers will love. Write wonderful stuff, sit back, relax and enjoy the subscribers flowing in. I am here to help if you need something with MailChimp setup for your Blog.
- Create Powerful Contact Forms using 123ContactForm.com
- Create a Contact Form for your Blog in minutes using Wufoo
- How to create a Web Questionnaire Form in 5 minutes?
- How to get a Daily Summary of your Overactive RSS feed?
- What to do with your Old Blog Posts that Died without Readers?


