Are you wondering how to setup a contact form for your Blog? Are you sick of installing one more plug-in or add-on? I will show a very simple way to setup an attractive contact form with validation, using Wufoo. Read on!
1. Sign up with Wufoo

Wufoo is an excellent service that helps you build variety of forms online. The range of forms include Contact Forms, Payment Forms, Survey Forms, Online Petition, Employment Application etc.
Signing up for Wufoo is free, but the free plan comes with the usual limitations. Paid plan gives you more freedom when it comes to the number of forms and number of entries. You can see all the pricing options here.
To start with – FREE plan should do good if you don’t anticipate more than 100 entries per month. Also FREE plan limits you to just 3 forms, with less than or equals to 10 fields each.
2. Create the Contact Form
Once you have signed up for an account and logged in, click on the New Form button at the top of the page.
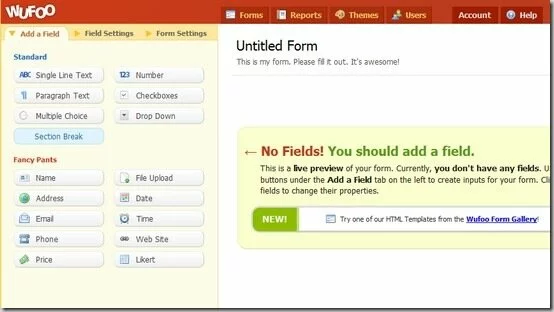
You will get an empty form like the following, with no fields in it.
Now you have 2 options:
- Click on the Wufoo Form Gallery link and choose one of the predefined Form templates
- Start building your Form from scratch
I personally prefer the second option. You don’t have to be a Web designer to design the forms with Wufoo. Just add the fields one after another, from the toolbox on the left.
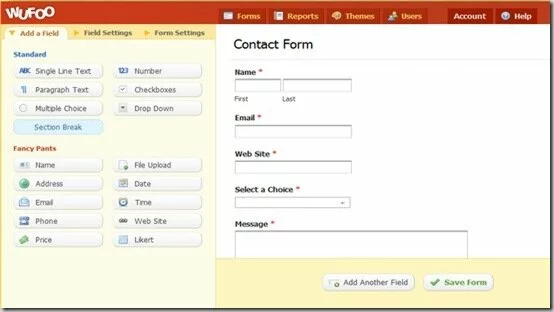
I recommend the following fields for a simple Contact form. Be sure to make all the Fields as Required.
- Name
- Web Site
- Select a Choice (Dropdown – Value of choices depend on your skills and services)
- Message (Paragraph Text)
Following is an example form, as how it would look.
You can also click on the Form Header to – Change the form name, Enter instructional text and confirmation message and so on. Also select particular fields on the form, to setup field validations and instructional text.
Click on the Save Form button and make sure that the changes are saved. Go back to the Form Manager page.
3. Setup Notifications
Then you need to setup notifications when someone fills up the form. In the Form Manager screen, click on the Notification button at the bottom row of your Contact Form.
Following methods of notification are currently supported with Wufoo – Email, Text messages to Mobile or RSS Feed (you need to subscribe)
Once you have setup your favorite method of notification, go back to the Form Manager page.
4. Link the Contact Form to your Blog
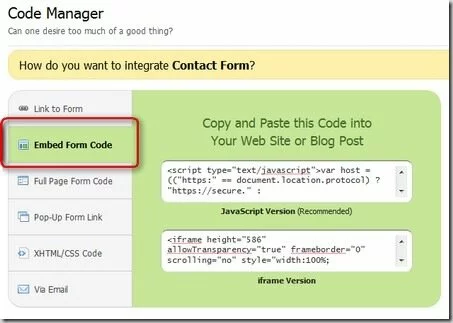
In the Form Manager screen, click on the Code button at the bottom row of your Contact Form. Following options are displayed to integrate with the contact form. To keep things simple, let us choose the Embed Form Code option for our blog. This requires minimum code and setup work.
Copy the Javascript Version to your clipboard.
Now go to the Pages section of the WordPress Administration Panel (or depending on your Blog engine). Get into the Contacts page and paste the code in the HTML view. Create a Contacts page in case you don’t have it.
If the Form you just build has a header in it, you can even get rid of the Page Header as it may be redundant.
From the Code Manager, you can even choose the Full Page Form Code option to gain more control over the HTML form and the CSS. But the Javascript Version is simple to setup and easily blends with the look of your blog.
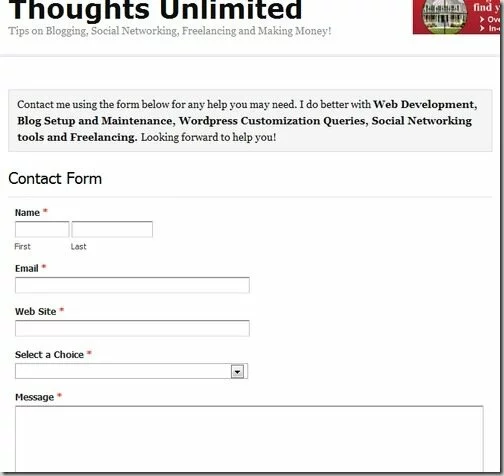
Following is how the contact form appears in my blog.
Note that the validation for missing fields is already embedded in the form. You don’t need to worry a single bit!
5. Sit back and Relax!
That’s it! Now when someone fills out the form, you get a notification based on your preferences.
Make sure to upgrade from the FREE plan when your blog gets popular and the contact form starts getting more than 100 entries per month.
From the Wufoo home page, you can also view Form statistics like Number of Views, Number of Entries etc. Make sure to use them!
If this tip was helpful, please leave a comment on this blog about your experience. Thanks for reading!


Hi thanks for the info!
I was just wondering is there a way to review or control the comments leaved by visitors when using wufoo?
Kind regards,
Karel