Top 5 Reasons why You are Losing Traffic on your Blog

A Blog is hale and healthy, as its Traffic.  Once the Traffic starts Decreasing, eventually the Conversions and Sales through the Blog, start moving South.  So, it is absolutely essential that you keep your Blog Traffic on the Rising Mode.

Do you know the “Top 5 Reasons” why Your Blog might be Losing Traffic?

1. Stale Content

You must keep pumping New Content in to your Blog, on a Regular Basis.  A Blog with Stale Content can lose Traffic very fast.

Maintain a Blogging Schedule and Stick to it.  Find out what your Readers like and Post more of such Content.  “Action brings Traffic” – and that’ very true with your Blog.

2. No Promotion

With so many Blogs and Sites existing, it is hard for People to read your Blog all the Time.  Also, Search Engine results keep varying based on the Relevance and Popularity of the Sources.

Thus, you must Make Sure to Promote your Content through Social Media (Twitter, Facebook, StumbleUpon etc.) and Blog Networks.  Never wait for the Search Engines or your Readers to Promote – though that is important too.

Proactively Promote Blog Content for Better Traffic

3. Content Not Optimized for Search Engines

If the content in your Blog is not optimized for Search Engines, then over a period of time the Traffic decrease.

Though you have been writing and promoting Content, the Search Engines are unable to find them.  Since, most readers reach Blogs or Sites from Search Engines results – it is essential that your Content is optimized.

4. Poor Design

Though this is not a direct cause for Losing Traffic, a Bad Design can prevent one-time and occasional readers to reach your Blog again.

This is more of a non-verbal reason than a tangible one, but it can surely impact the Traffic.

5. Poor Networking

Network with your Readers.  Network with your fellow Niche Bloggers.

Without these networks, it is difficult for your Blog to Survive and attract more Traffic.  Your Blog is part of the “huge” Blogosphere and Networking is essential to thrive.

To Summarize…

Here are the Top 5 Reasons why your are losing Traffic on your Blog (make sure to correct them, if there’s a problem):

  • Stale Content
  • No Promotion
  • Content not Optimized for Search Engines
  • Poor Design
  • Poor Networking

Know of any other Reason to lose Traffic on a Blog.  Share it with us!

A Lesson learned from Bryan, put to use!

I had the privilege of watching the session SEO Copywriting Made Simple for Freelance Writers, by Brian Clark yesterday in the International Freelancers Day.

Here is a lesson I learned and put to use, almost immediately!

One of the important SEO tip he shared, was to maintain a single page repository of your Prime content.   This not only helps in Internal Linking, but also helps you focus on promoting and tracking the SEO of just the repository page rather than all the individual Blog Posts.  Awesome!

I followed his advice and created my first repository page on Blogging tipsclick here to view the tips

By the way, International Freelancers Day seminars have been awesome so far.  It’s running today too – if you have still not registered, do so here!  There are some awesome sessions to come yet.

5 SEO Health Checks for your Blog

SEO Health Check

SEO Statistics and facts are good to know, especially if your Blog is in existence for more than 6 months.  These statistics help you identify areas where the blog excels and where it fails.  In this post, I will show you 5 Essential SEO Health Checks that can reveal hidden problems of your Blog.

1.  Check SEO Stats with Website Grader

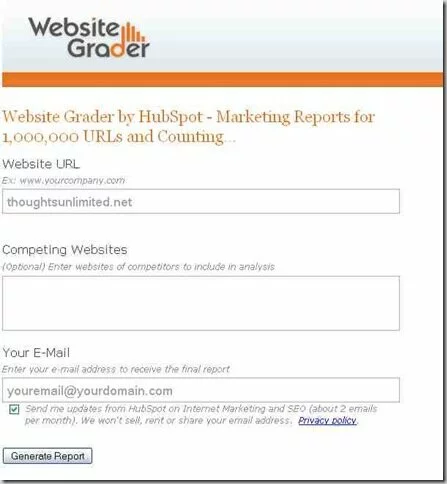
Website Grader is a free SEO tool that analyzes your website and provides you with a report on the site’s marketing effectiveness. Though the term SEO appears nowhere here, the report is very detailed and provides you with lot of information on the SEO effectiveness.

Website Grader

Some of the key points in the generated report include:

  • Page Title, Meta Data Description and Keywords – these are something that the searching engines generally look for.  Make sure these are relevant to the content of your blog.  Also the report suggests whether the Meta Description or Keywords are too long
  • Heading Tags Summary – Gives you a list of H1, H2 and H3 tags used in the home page and some inner pages.  Also reports the presence of multiple H1 tags which is not a good SEO Practice
  • Image Summary – Reports the number of images and missing ALT tags
  • Google Page Rank and Indexed Pages
  • Last Google Crawl Date – Lets you know when was the latest crawl of your blog
  • Number of Diggs and Delicious Bookmarks
  • Many other useful statistics…

You can check a sample report here – http://www.grader.com/site.php?URL=www.hubspot.com

2.  Check SEO further with PageBoss

PageBoss is a similar tool to Website Grader, but with emphasis on numbers.

It gives you Numbers and Statistics from a lot of sites and here are a few ones:

  • Google
  • Yahoo
  • Twitter
  • Alexa
  • Friendfeed
  • StumbleUpon
  • Digg, etc.

You can use this report together with Website Grader to look for the grey areas.

3.  Check how your Blog appears to a Spider

Lots of essential content and keywords of a webpage may not be visible to the Search Engines, because of components like Javascript, Flash content, Images etc.

Search Engine Spider Simulator is a tool that simulates a Search Engine and displays the contents of the web page exactly how a Search Engine would see it.  This helps you understand if the Search Engines are reading meaningful content or just meaningless Javascript.

Spider Simulator Result

A Sample report on how a Search Spider sees a website

Here is an example of the Spider Simulator output when run on my blog.  If you see a lot of Javascript or Flash Script Tags, make sure to detect the plug-ins or theme components that are responsible for this!

4.  Check Meta Tag and Keyword relevance to your Blog Contents

Another important check is the relevance of your Meta Tags and Keywords to the content of your Blog.  Search Engines generally ignore sites which claim a few keywords but the content doesn’t go well with them.

Meta Tag Analyzer is a tool to explore the Meta Tags and Description of your blog, to give you the “relevance” metrics.  This provides a clear picture with the facts and areas of improvement.  Other useful information out of the report include – URL Analysis, Keyword Analysis and the Keyword Density.

Page Keyword Analyzer is a very similar tool that takes in – specific keywords and URL – and gives you a report on whether the site has relevant content.

5.  Check W3C Validation Status of your Blog

W3C Markup Validation Service helps you determine whether the HTML tags and the markup used in the page are valid.  This is especially a problem, if you are using some badly designed Themes or Skins.

In addition to SEO problems, bad HTML also causes display and rendering issues with a few browsers.  So make sure to identify markup problems using this tool and fix them.

These are some of the basic SEO checks, anyone can run on their blog without spending a penny.  If you are very keen about the traffic and Google ranks, you should hire a SEO Consultant.

Here are some useful posts around, on checking and improving your Blog SEO:
SEO For WordPress – Daily SEO Blog, by Mani Karthik
Thesis SEO – For Everyone, by THE MULES
Site Clinic: An SEO Checklist for your website, by Digital Inspiration

Everything you wanted to know about XML Sitemaps [SEO Tips]

What is a Sitemap?

Sitemaps are an easy way to tell search engines about pages on the site, that are available for crawling.  There are two types of sitemaps:

  • HTML Sitemap – Listing of the pages of your site, so that the users can find relevant and important information faster
  • XML Sitemap – List of URLs for a site, along with additional metadata that are particularly useful for Search Engines

In short, XML Sitemap is a list of URLs on your website and a way to make sure that the Search Engines knows everything about them.

Why does your site need a XML Sitemap?

As said earlier, a Sitemap makes it easy for Search Engines to understand your site.  This translates to your site featuring in relevant search queries, thus increasing your site traffic.  In short, your site needs a Sitemap to increase the traffic.

Sitemaps are particularly helpful if:

  • Your site has dynamic content, like Blogs that have new content added almost everyday
  • Your site’s pages are not easily discovered by search engines (e.g., your site has lots of AJAX and Flash pages)
  • Your site is very new and has few incoming links into it
  • Your site has lots of archived pages that are not really linked with each other

To know more about Sitemaps and their need, refer to Google Sitemaps help.

How does a XML Sitemap look like?

If you are technically savvy and interested to know how a XML Sitemap looks like – following is an example:

[sourcecode language='xml']


  http://website.com  
   1.00    daily

[/sourcecode]

XML Sitemap has many such elements that points to a location on your site.  The Priority denotes the relative importance of an URL in your site and Change Frequency denotes how often the content at the URL changes.

Enough Theory.  How do I create a XML Sitemap for my site?

Command line Sitemap Generator

Google has a Python script, that creates a Sitemap using the Sitemap Protocol.  But to use this script, you must have a command line access to your web server and Python 2.2 installed.  In a few cases, this is not readily available and the command line sitemap generator may not be used.

Refer to the Google Sitemap Generator page on instructions to setup and use this tool.

Web based Sitemap Generator

A lot of web based XML Sitemap generators exist, that takes in the Homepage URL of your site and gives you the “sitemap.xml” file.  You will have to upload this file to the root of your Website.  For example, if your Hompage URL is https://thoughtsunlimited.net, then the “sitemap.xml” file must be copied there.

XML Sitemaps is one such site, that takes in your Website URL, some optional parameters and crawls your website to generate a complete XML Sitemap.  But the downside with the free service is that the number of URLs are limited to 500.  If the number of URLs on your website exceed 500, then the free service may give you only the partial XML Sitemap.  However, you always have an option to use the “Paid version” to get the complete XML Sitemap.

Google XML Sitemap Plugin for WordPress

If you use WordPress as the CMS, then the help is right there in the form of a WP Plugin.  You can download the Google XML Sitemaps plugin here [ZIP file].

Plugin Homepage has the complete set of instructions on how to install and start using the plugin.  This plugin has an elaborate administration page, but the default options must hold good for most the WP sites.  Also, this plugin takes care of updating the XML Sitemap whenever posts are added, edited or removed.

XML Sitemap is created.  Now What?

If you use any of the manual methods to create the XML sitemap, then the “sitemap.xml” that is generated must be uploaded to your website’s root, using your favorite FTP tool.  Once this is done, the file must be submitted to the Search Engine webmaster tool for crawling.

First you must setup your website with Google Webmaster, so that it can be considered for crawling.  Google Webmaster Central has sufficient resources to get started with.

Once your website is configured with Google Webmaster, navigate to the ‘Sitemaps’ area and submit your “sitemap.xml” file.

Last word

So, a XML Sitemap helps your site gain better visibility with the Search engines and increases the traffic.  This is a must have SEO enhancement for every webmaster, who wishes to popularize his/her website.

Starting with SEO #5 – Essential SEO Plugins

WordPress is well known for its plugins, when it comes to extensibility. There are many plugins around, especially to make your blog SEO friendly.

Check out this post, on the 9 SEO plugins that every blog should have. It is a nice collection of some very useful plugins.

Thanks, Darren Rowse for sharing the list with us.

Previous Posts in this series:

  • Starting with SEO #1
  • Starting with SEO #2 – Page Titles and Meta Tags
  • Starting with SEO #3 – Anchor text and Images
  • Starting with SEO #4 – Similar Posts

Starting with SEO #4 – Similar Posts

Over a time, any blogger publishes a good number of posts, that are around a similar topic. Generally, the link between posts are derived using the Post Titles, keywords in content, Categories and Tags.

Including Similar posts in your blog have the following two major advantages:

  • Readers can navigate to and read similar posts, with ease
  • Search engines can better identify the related posts, thus increasing the Internal Pagerank

As usual, WordPress bloggers can achieve this using the WordPress Similar Posts plugin. The plugin page has detailed instructions on how to install and get started. However there is a prerequisite of the Post-Plugin library (ZIP), that must be installed. I would better suggest to add the PHP code in the Single Post file, so that each of your post has information on the related posts.

There are quite a few options that can be configured – number of similar posts to show, the matching criteria etc.

In a related note, you can find here an interesting tip related to Similar posts plugin. It suggests a small hack to decouple the Date/Time information from your Similar posts link, so that it makes better sense for the Search engines.

Previous Posts in this series:

  • Starting with SEO #1
  • Starting with SEO #2 – Page Titles and Meta Tags
  • Starting with SEO #3 – Anchor text and Images

Starting with SEO #3 – Anchor text and Images

Anchor text

Anchor text is a clickable text on a HTML page, that takes the user to another HTML pages either within the same site or a different site.  This is usually achieved using the HTML tag.

Better the anchor text is, easier it is for the users to navigate and simpler for the Search engine to understand the page that is being linked.

Some good practices for anchor text as per Google SEO Starter guide:

  • Choose descriptive text – Avoid text like “click here”, “this” etc. for Anchor tags
  • Write concise text – don’t use anchor tags for a complete sentence or a paragraph
  • Format links so that they are easy to spot – avoid CSS styles that make links look like normal text
  • Remember these tips while linking for internal pages too – this will help the Search engine to navigate your site better

Images

Bloggers use images a lot in their posts.  Some of these images do serve as hyperlinks, taking the user to other pages.
A HTML developer definitely knows about an attribute named “alt” in the HTML tag.  The primary purpose of this attribute is to display an alternate text, if the image could not be displayed for any reason.  But with reference to SEO, the “alt” text serves some additional purposes:

  • “alt” text serves the same purpose as a Hyperlink text, if the image is an Hyperlink – This helps the Search Engine to understand the target location
  • Optimizing Image file names and the “alt” text makes it easier for Image search projects like Google Image Search

Again, following is an excerpt from Google SEO Starter guide for good practices with images:

  • Use brief, but descriptive filenames and “alt” text
  • Supply “alt” texts, especially when using images as links
  • Store images in a directory of their own – example, http://domain.com/images
  • Use commonly supported file types – JPEG, GIF, PNG, BMP

Keep watching this space for further tips.

Previous Posts in this series:

  • Starting with SEO – #1
  • Starting with SEO #2 – Page Titles and Meta Tags

Starting with SEO #2 – Page Titles and Meta Tags

Page Titles

Title tags provide a description on the content of the page, to both search engines and users. Title tags are recommended to be unique for each page and post (in case of blogs). This will highly improve the chances of your posts, making into top search results.

As per Google SEO Starter guide (PDF), following are the recommendations for efficient title tags:

  • Accurately describe page content
  • Create unique title tags for each page
  • Use brief, but descriptive titles

But as a blogger, it is virtually impossible to hand code the tags for each of your pages.  A better solution is to install a plugin like WordPress SEO Title tag plugin.

This plugin provides you with flexibilities to achieve appropriate tags for each pages and posts.  When creating a post, an option exists to provide tags for the Title, using which suitable tags are created.  Otherwise, you can choose to use the Post title as a tag.  In addition, it provides more options, that can be found in the plugin home page.

Meta Tags

As every Web developer might know, tags provide information about information.  With a Search Engine, a page’s description tag gives a summary of what the page is about.  With reference to Google, description tags might be used as snippets for the pages, in search results.

Google Webmaster blog has an informative post on using meta tags to improve page snippets.  This post should give you a better idea on how Meta tag information is used by the Google Search Engine.  For further information, you can refer again to the Google SEO Starter Guide (PDF).

Again, as with tags, it is not possible to customize the tags for each post and pages.  This is where the Add-Meta-Tags WordPress Plugin comes handy.  Once this plugin is installed, you have the following options:

  • Define tags for Home page and other pages
  • Define tags in XHTML format for each of your posts

Hope you found these useful.  Be tuned for further tips and suggestions on making your Blog, SEO friendly.  After all, it is good to learn together!!

Previous posts in this Series:

  • Starting with SEO – #1

Starting with SEO – #1

I have been blogging for quite some time. But only recently I was struck with the buzzword, SEO. For those of you who are unaware of this term but running a blog (and looking to popularize it!), I would like to share my learning through this series of posts.

SEO stands for, Search Engine Optimization. This means, optimizing your web page or blog, so that your pages shows up (possibly at the top!) for any relevant searches using the search engines. (I know this is a crude definition!!)

To start with, you can have a look at the video of a speech given by Stephen Spencer, in the WordPress conference.

Once you appreciate the need for SEO, have a look at the SEO Starter guide compiled by Google. This should help the blogger optimize or fine tune his/her blog, for searches.

Stay tuned and I will share more of my learning through this series. Happy blogging!!